
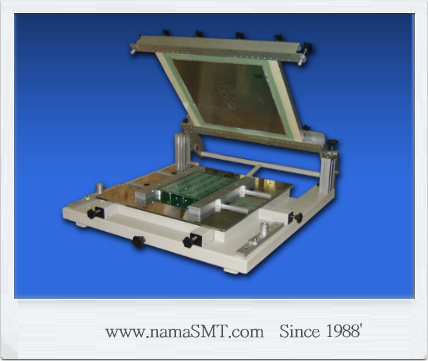
본 110 Solder Printe는 어떠한 Frame도 호환이 가능한 Manual Printer 입니다.
양산용 Frame도 고정이 가능하며, 수동 프린터에서 작업 혹은 자동 프린터에서
작업 시 프레임 호환에 대한 문제 없이 Univeral 하게 사용 가능한 장비이다.
Proto type 혹은 양산 전 PP 생산을 하는 용으로 적합하다.
세부 사항에 대하여 하기 내용을 참고 하시기 바랍니다.
적용 공정 : 연구개발 / 소량 다품종 / PP 생산을 위한 솔더 프린팅 / Big Size 솔더 프린팅 공정 적합.
110 Manual Stencil Printer Key Features
- The ideal choice for low-volume, high repeatability stencil printing of large boards.
- Especially suitable for prototype printing of LED panels and first-article runs.
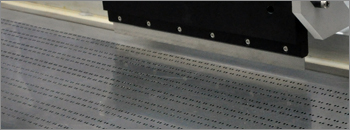
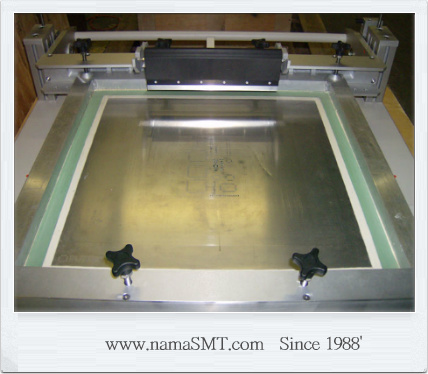
- Expansive work area accepts 610 x 610 mm single-sided or double-sided PCBs.
- Larger boards to 610 x 1200 mm optional.
- 250 mm handheld metal squeegee included.
- Underside magnetic support pins facilitate fast changeover.
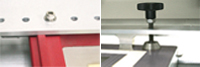
- Tool-free, self-locking, micro-adjustment in X, Y, Z and theta.
- Accepts screw mounted or clamp-type stencil frames.
- Adjustable registration hardware included for setup by edge-mounting or tooling pin.
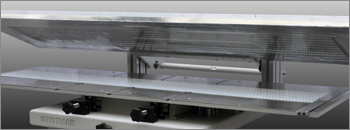
- Counter-balanced, user adjustable, easy-lift frame.
- Heavy-duty cast aluminum base provides exceptional stability.
SUMMARY
Precise, reliable and easy-to-usePrecise, reliable and easy-to-use
Autotronik stencil printer is ideally suitable for the needs of prototype
and low-to-medium volume production.
Large print area capability
The large print area capability allows printing up to 610 mm x 610 mm.
It accepts standard SMT frame sizes from 300 x 300 to 736 x 736 mm.
Both obverse and reserve sides of screen are also applicable.

High repeatabilityIn order to provide fast print alignment and high
repeatability, the X, Y and Theta adjustment are self-locking.
The highly functional design provides fine pitch capability for boards
with registration repeatability +/- 0.02 mm.

Ready for double-sided PCBLarge print area capability
The PCB board is supported by a universal frame holder, no extra tool
is needed for double-sided printing.
The ease universal frame holder also allows the fast stencil and screen
mounting and removal.
EASY SET UP
Step 1 Install the stencil frame.
* Support frame types: Screw lock frame or Clamp frame.
Step 2 Set up the PCB board
누구나 쉽게 솔더 프린팅 작업
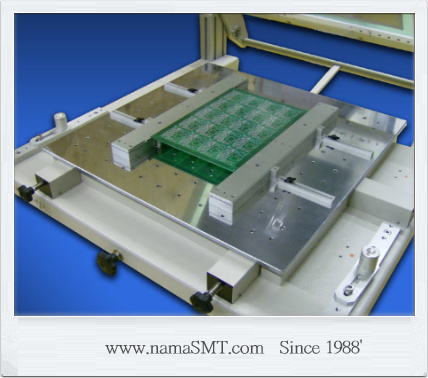
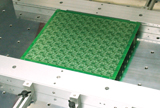
PCB Guide Plate가 있어 고 품질 가능 솔더 작업 가능
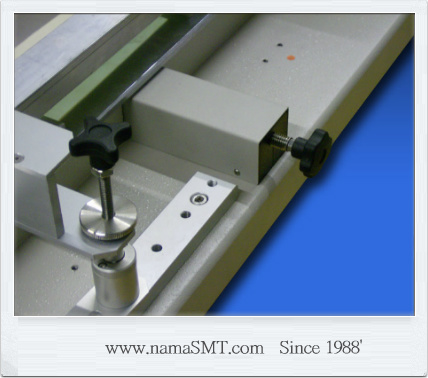
X.Y.Z.D측 세밀 조절 가능
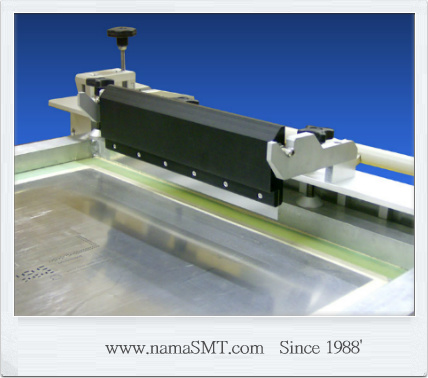
프린터 청소 대기 시 Squeegee Holding Station
후면 좌/우 전면 좌우 높이 조절 가능
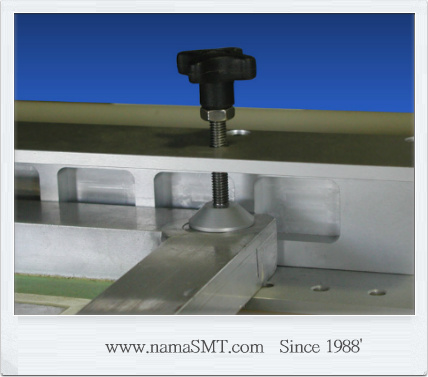
간편하게 PCB Frame 고정 장치
|


.jpg)
.jpg)
.jpg)
.jpg)
.jpg)


